Vanlife Build My Inventory Ford Transit
Updated: October 19, 2025
Curious about what goes into a functional vanlife setup? This page offers an in-depth look at my build. I have a 2022 Ford Transit 250 AWD HR Crew van, though most of what I list will apply to other vehicles such as a Sprinter or Promaster.
Electrical
Here is a comprehensive breakdown of my van's electrical system and connected appliances. I'll cover everything from the 3,600Wh EcoFlow Delta Pro and 600W solar array, to multiple charging methods and the specific gear that powers my adventures.
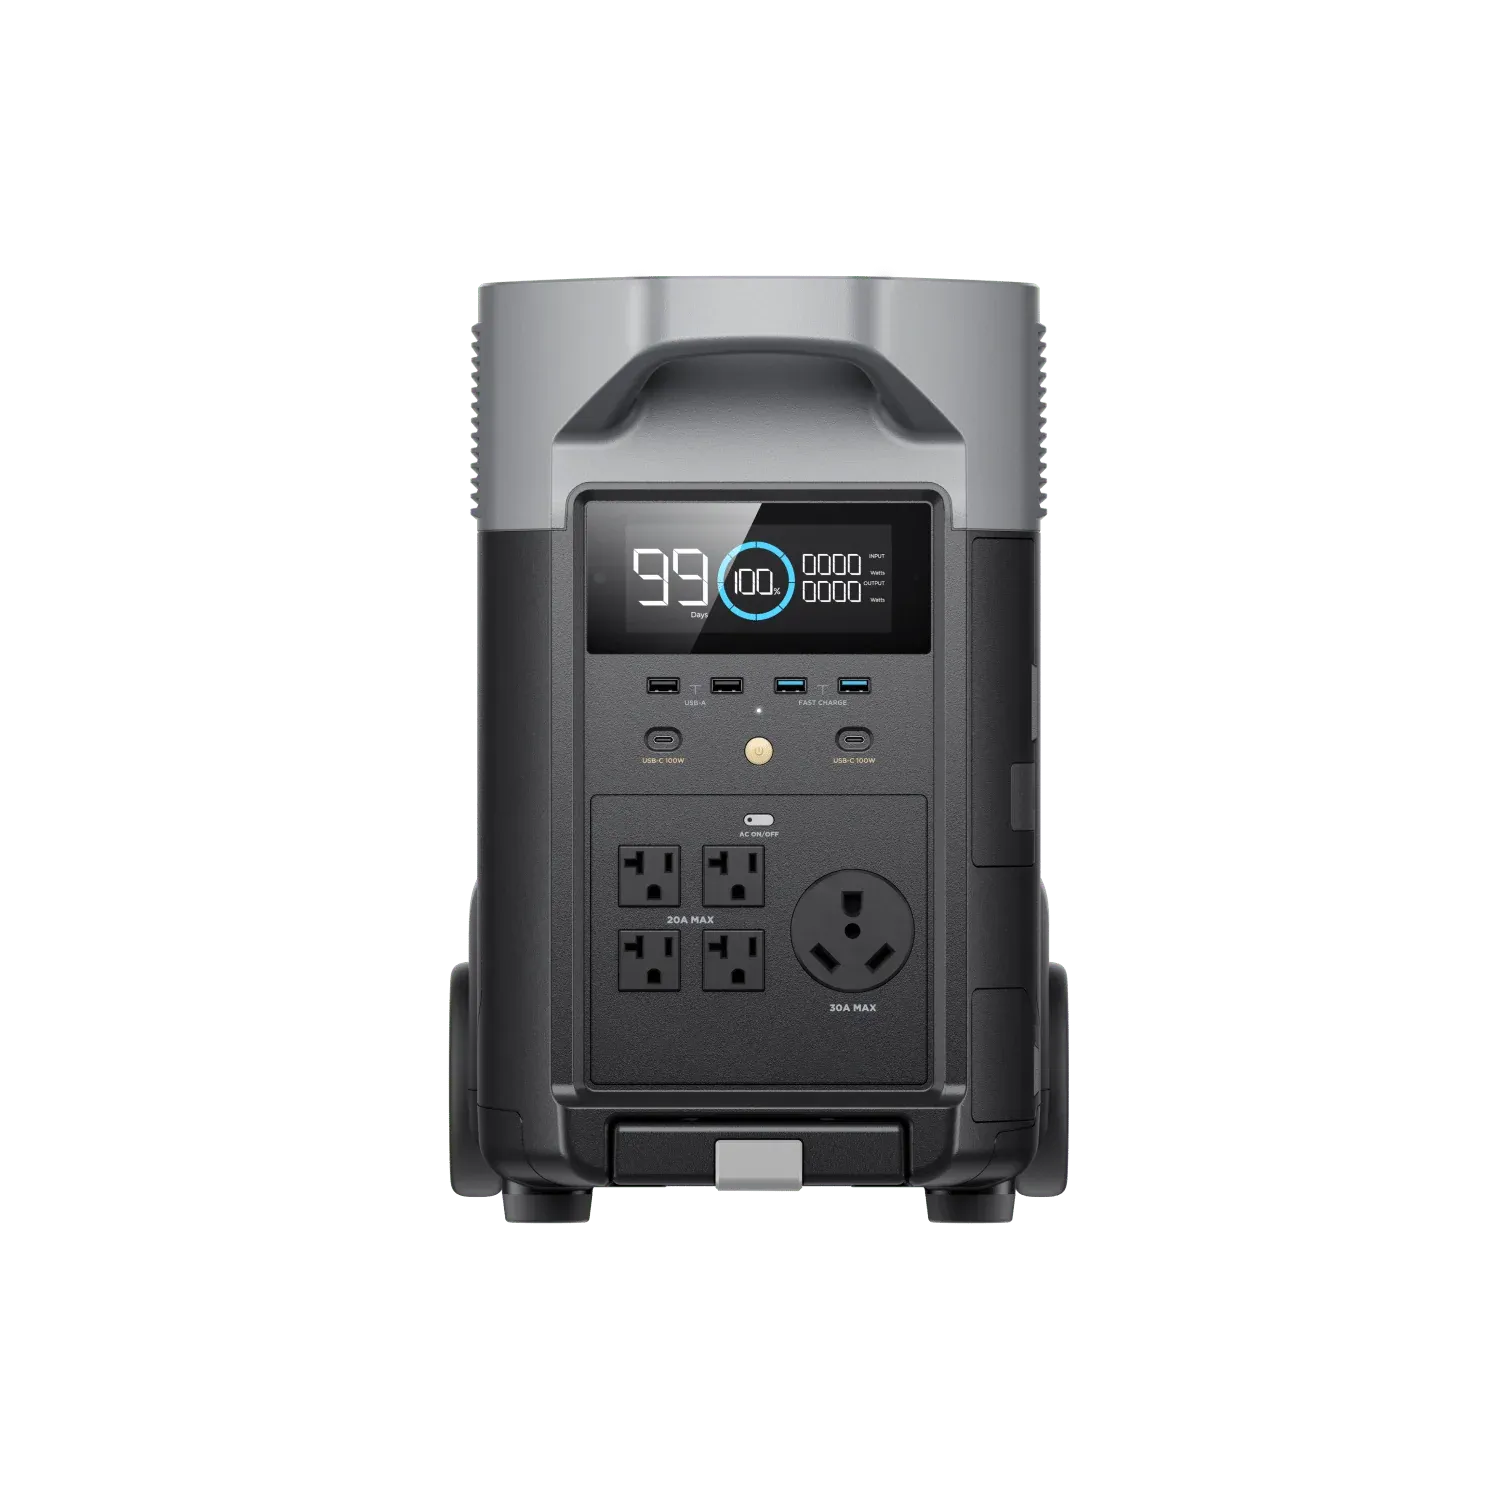
A great product that is powerful enough for most setups and the current pricing makes it very budget friendly! Corresponding app is well designed and reliable.
Price: $1,399
Size: 25 × 11.2 × 16.4 in
Capacity: 3,600Wh
AC input: 15A 1,800W
AC output: 3,600W total (7,200W surge)
AC ports: 4x (20A each), 1x (30A)
DC output : 12.6V⎓30A, 378W (total)
Cigarette port: 12.6V⎓8A, 100W
Solar input: 11-150V⎓15A 1,600W
Alternator input: 100-800W
USB: 2x (USB-C), 4x (USB-A)
BMS inaccuracy: Charge and discharge capacity is unreliable. I have taken the unit from 100% to 0% and back several times but it is still inaccurate.
Clicking sound: In the early morning it makes a clicking sound. I believe this is a relay that is switching on and off when it detects some voltage from solar but not enough to charge it with. It's pretty quiet but if I wake up I find it annoying and makes getting back to sleep more difficult. I wish there was a way to turn off solar charging via the app. I can sometimes get around this by adjusting the charge limit (under "Energy management"), however it can't be set to less than 50%.
Fan noise: Quieter is always better. It's loud when it's charging via shore power or the inverter is on. I have not had issues with it being loud while trying to sleep, but perhaps EcoFlow could add configurable quiet hours which prioritize optimizations.
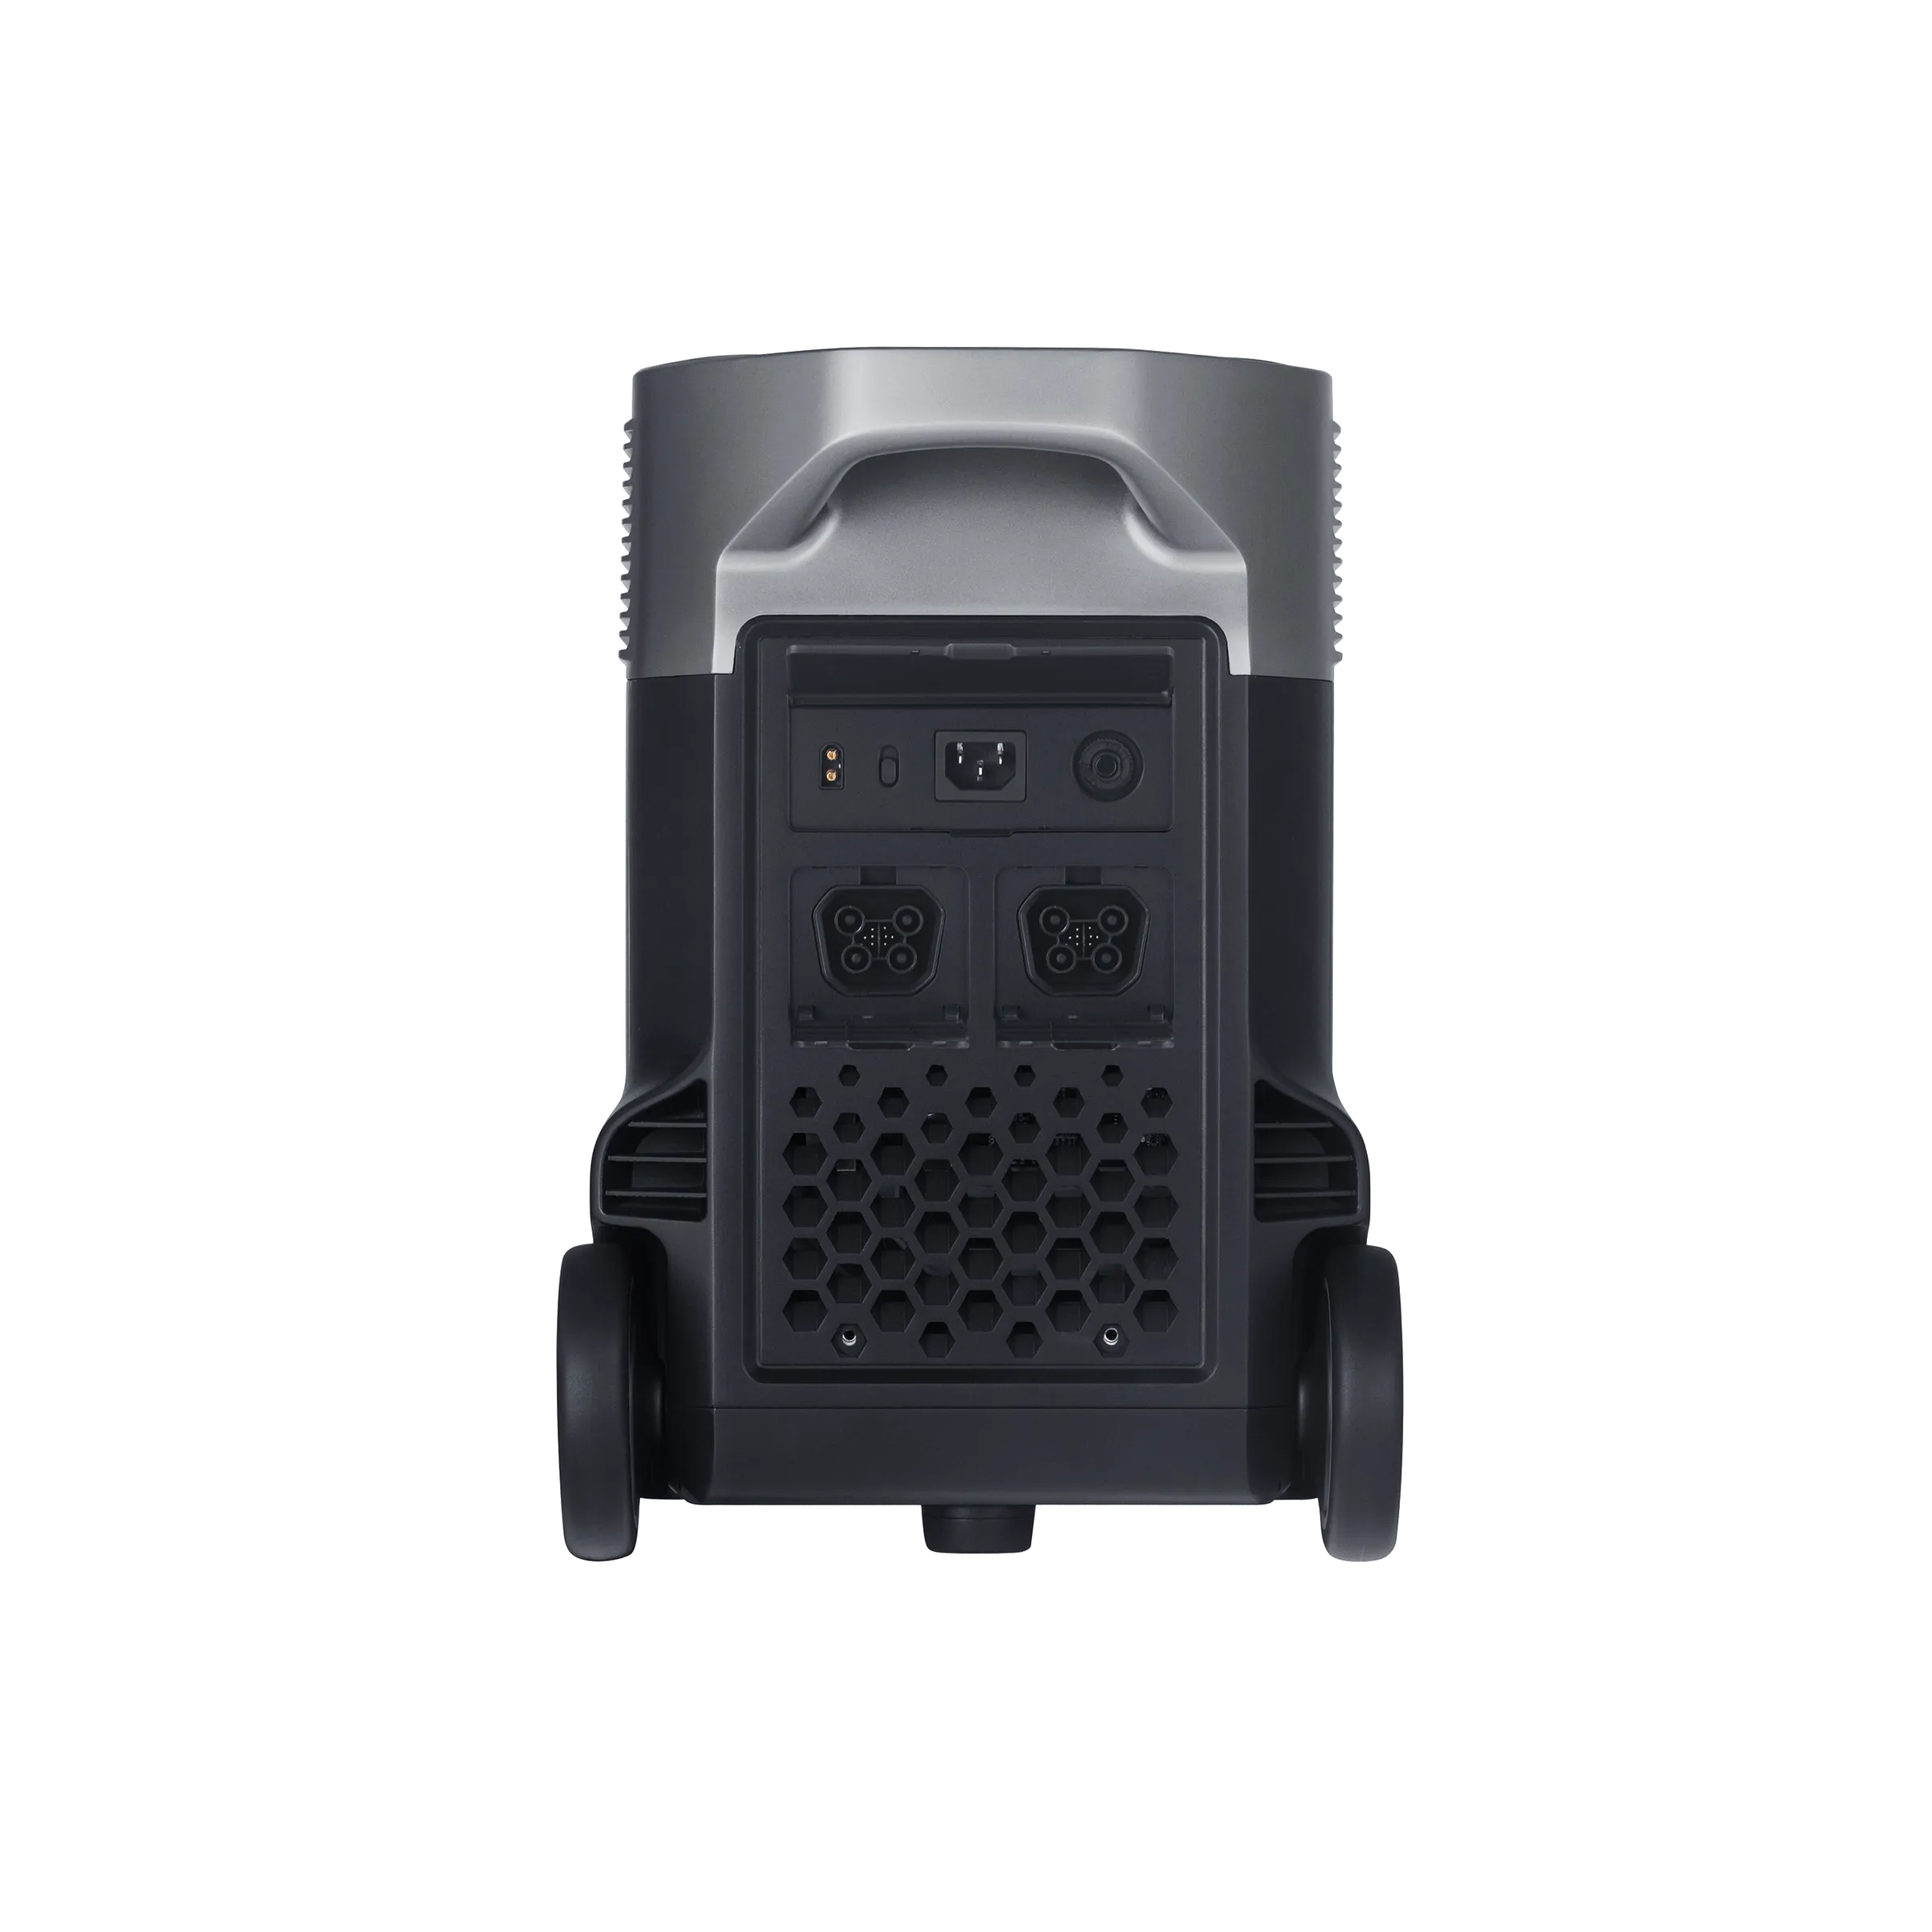
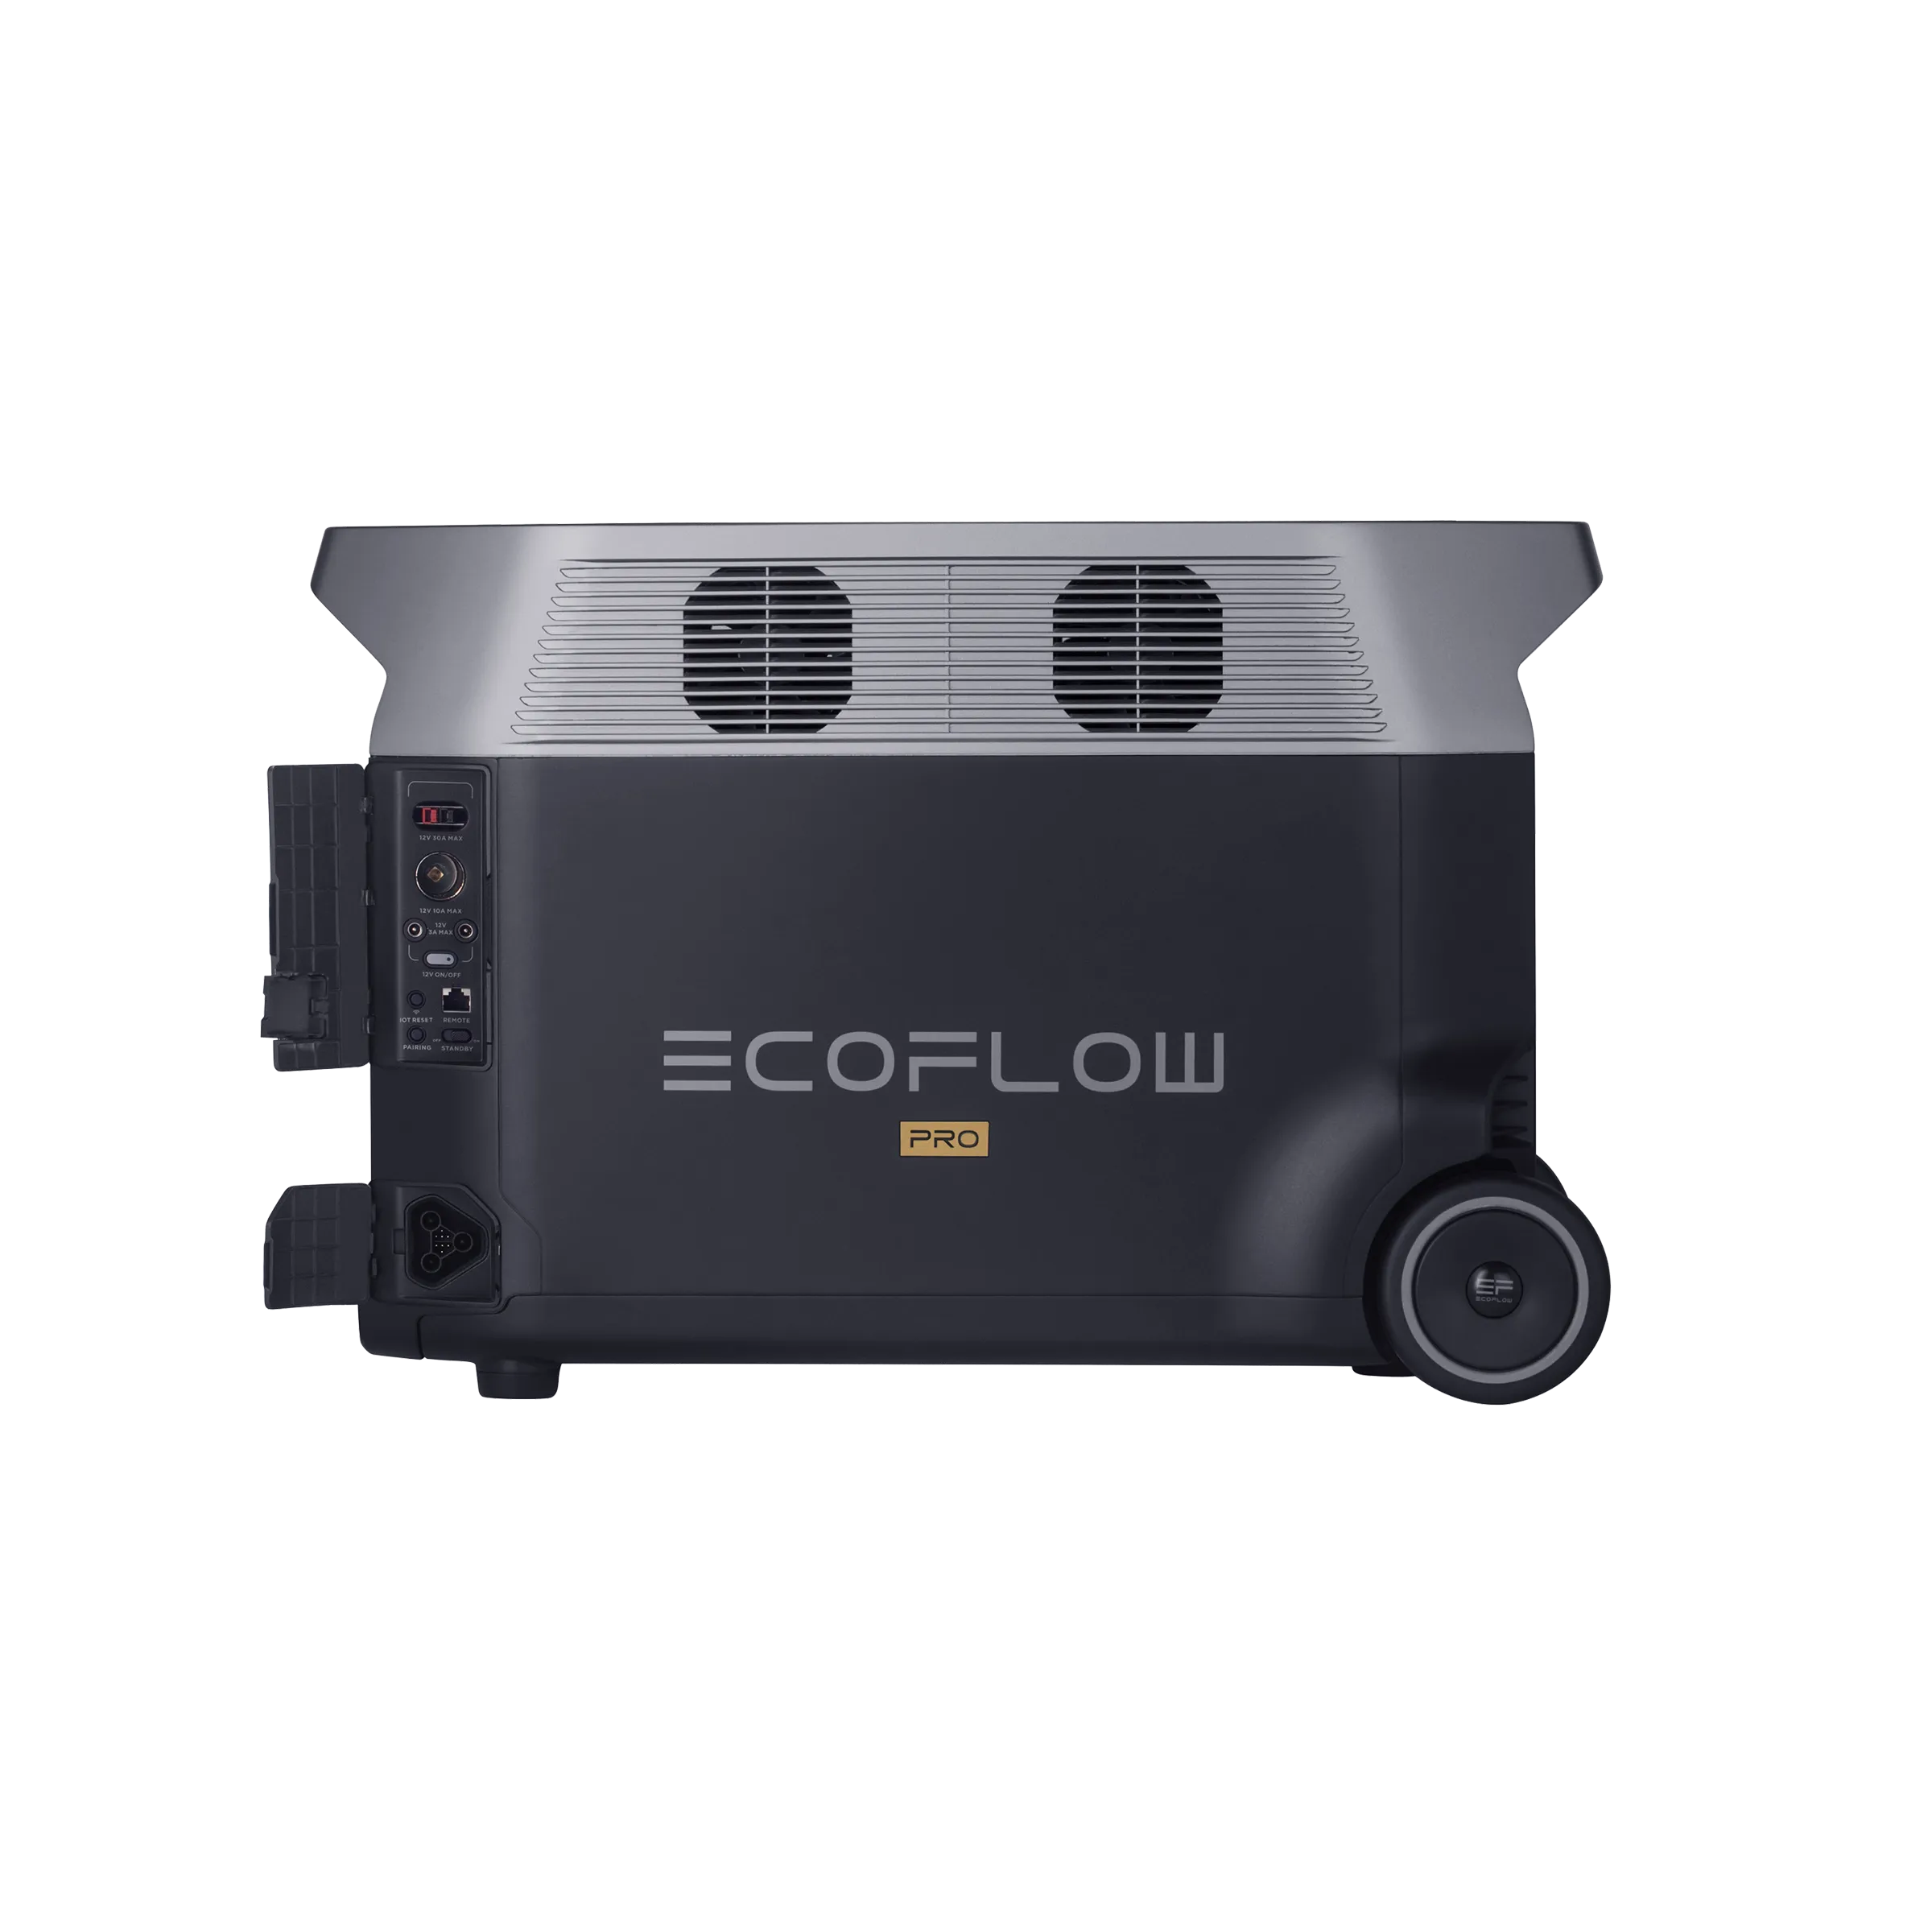
Side ports: I wish the DC port were located on the back of the unit (instead of the side) like is the case with the new Delta 3 Max Plus and Delta 3 Ultra Plus. The side location makes the cables susceptible to being bumped into.
Mounting locations: The sturdy handles work reasonably, however it would be awesome to have dedicated threaded inserts near the base of the unit which could be used to keep the unit in place in a vehicle.
Product documentation: I wish EcoFlow would provide further specifications for their products including how much power is lost due to operating similar to what Victron provides for their components.
Overall, I'm very happy with the product. My original Delta Pro failed after 2 years of use; however, since I purchased it from Costco, the return process was simple and I was able to return it the same day and then order a new one online.
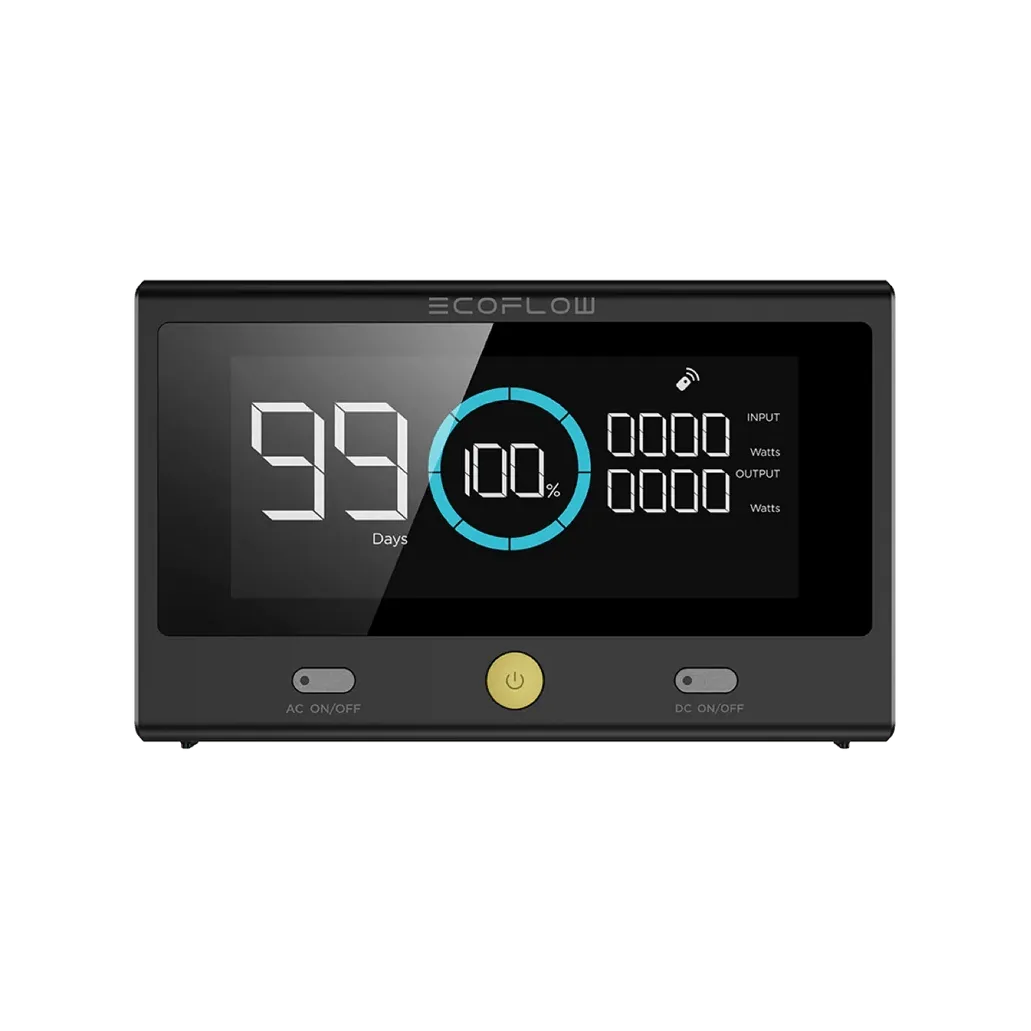
Monitor your energy (capacity, input, and output) and have easy access to turn on/off the AC outlets, DC outlets, or the entire unit. I got this as part of a package deal but it can be purchased separately. I use Ethernet for both the connection and power source.
Price: $99
Size: 6.3 × 3.8 × 1 in
Connection: Bluetooth or Ethernet
Power: Battery (AAA), Ethernet, or USB-C
Overall, very good product. My only two nitpicks are: the LED light can be bright at night so I unplug it while sleeping, and alternator charging input doesn't display on it correctly.
Alternator charging is crucial for vanlife as it efficiently recharges your power station while driving, often proving more reliable and faster than solar, especially on cloudy days or extended drives.
This is a game changer when paired with an EcoFlow power station. It can even reverse its charge and charge your vehicle’s battery from your EcoFlow.
Price: $289
Cable Included: XT150
Max Charge Rate: 800W
Max Reverse Charge: 800W
Max Battery Maintenance: 100W
Install Guide: Ford Transit
EcoFlow + Ford Transit
Included in EcoFlow's 800W Alternator Charger but can be purchased separately.
Price: $99
This adapter is needed to use the Alternator Charger (XT150 cable) with the Delta Pro. An alternative option would be to use the Custom Fit output cable.
Price: $69
Recommended if your Alternator Charger model comes with the original fuse block design, which is prone to breaking fuses.
Price: $25
The old fuse block design was flawed; if too much strain was put on the cable, it would cause the fuse to break, which would result in an under voltage error and the inability to charge anything with the unit. I encountered this on my 800W model (I’m unsure which fuse block the current 800W model ships with currently, as I pre-ordered mine last year when it was announced).
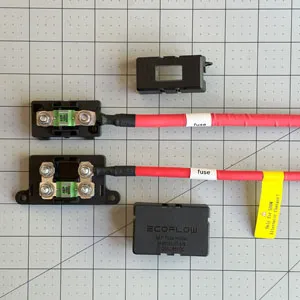
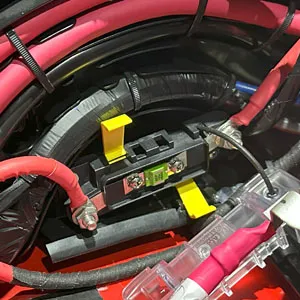
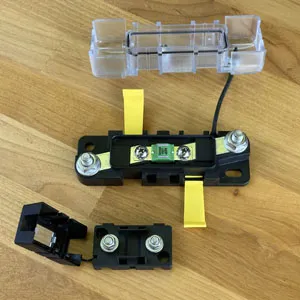
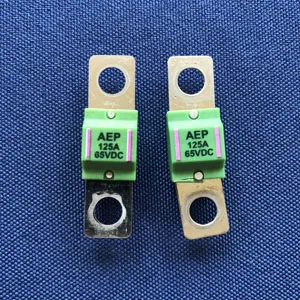
To resolve my issue, I purchased a Blue Sea 7720 Safety Fuse Block ($25 on Amazon) which has separate posts for the fuse ends and the cables. The new design incorporates this separate post design. This helps prevent the issue where lateral strain on the cable would cause the fuse to shift and break.
I used these in three spots. Two for where the positive cable connects to the Blue Sea Systems inline fuse block. One where the negative cable connects to the vehicle’s battery, as it needed a larger size.
Price: $7.20
Required tools: cable cutter, cable crimper, heat gun, and wire stripper.
After extensive testing, I found the best configuration for my panels to be all six wired in series. These tests included partial/complete shading of single/multiple panels. Often people recommend parallel configurations for partial shade, but fail to account for the bypass diodes in most modern solar panels.
Unfortunately, the exact size panel I purchased has been discontinued. The most similar model is the Newpowa Pro 100W (PRO100S-12I), which is slightly longer.
Price: $80.75 (each)
Model: NPA100S-12I
Size: 38.58 × 20.87 × 1.18 in
Power Output: 100W
Voltage MPP (Vmp): 19.23V
Voltage Open Circuit (Voc): 22.12V
Current MPP (Imp): 5.21A
Short Circuit Current (Isc): 5.50A
Type: Monocrystalline Silicon
For aesthetics, I wrapped the frames of my panels with black vinyl using Cricut vinyl so they blend into my black Unaka Gear Co. roof rack (original model, newer model).
Connect a solar panel array to your power station. Other lengths are available.
Price: $24.99
Length: 8.2ft (2.5m)
I used this cable between my solar panels and the XT60i cable. This is the cable that runs through my solar entry gland.
Price: $15.83
Length: 10ft (pair)
Gauge: 10AWG
Required tools: cable cutter, wire stripper, solar crimping tool (BougeRV).
Weatherproof way to get solar cables into a vehicle. It does require permanent modification by drilling/cutting a hole in the roof. Ensure it is compatible with your solar cable diameter.
Price: $9.99
Part: LS-2D0206BA
Recommended tools: drill, step bit, and rounded file.
I cut a sheet of 3M VHB double-sided foam adhesive to attach the entry gland to the roof (instead of using screws). After I attached it, then I used Sikaflex 221 sealant for extra protection from water leaks.
These allow you to adjust the length of your solar cables. One of my connectors came broken so I used this to quickly replace it.
Price: $7.99 (6 pairs)
Required tools: cable cutter, wire stripper, solar crimping tool (BougeRV).
Not only is DC power a must for many vanlife appliances, but it is also more efficient than running an AC inverter.
Allows you to safely connect DC appliances to your power station (heater, fridge, lights, etc.). There is also a 6 circuit model available (5025), but currently costs more and it's nice to have room to add extra circuits in the future.
Price: $31.00
Model: 5026
Circuits: 12
Max Amperage: 30A per circuit (100A total)
Max Voltage: 32V DC
Fuse Type: ATO® or ATC®
You will also need to purchase the appropriate fuses to match the wiring of your circuits. These can be purchased individually or in a multi-pack. Be sure to use a reputable brand as these are used to prevent an electrical fire.
Allows you to safely connect a DC fuse block to your power station's Anderson port.
Price: $13.59
Length: 25in
Gauge: 10AWG
Max Amperage: 45A (comes with 30A fuse)
Fuse Type: ATC®
A basic extension cord used to charge power station from grid power at home or at a campground. I use two of these, one going in to charge my power station and the other going out for outdoor cooking etc.
Price: $15.99
Length: 6ft
Gauge: 10AWG
Max Amperage: 15A
Max Voltage: 125V
Certification: UL Listed
An alternative option would be to use the Noco GCP1, however it only works as an inlet not an outlet. I installed this in a different vehicle I use with a battery maintainer.
I ran these cables through a factory hole in the floor (located behind the slider door). At first, I used foam insulation to help keep dust and water out. Eventually, I 3D printed a custom gasket using flexible TPU filament.
For fast charging an EcoFlow Delta Pro from a compatible EV station. I got this as part of a package deal but it can be purchased separately. The EcoFlow Delta Pro 3 requires a different adapter.
Price: $99
Max charge rate: 3400W
Type: J1772 EV connector
This saved me twice. First, I was on a long trip where I hadn't installed solar or alternator charging yet, and then I found out my 8A car charging cable was defective. Second, there was a large winter storm that caused my home to lose power. I was able to drive to a nearby EV charger to recharge as I was running a full-size fridge and freezer off it (saved all my food and kept my phone powered).
This came included with the Delta Pro, but can also be purchased separately. It's very slow, and I would use it as a last resort. I attempted to use it before I installed solar or alternator charging, however my cable was defective. EcoFlow replaced the cable under warranty, but I have not used it since other than to test that it works. I still carry it as a backup charging option.
Price: $21.99
Max charge rate: 8A (96W)
Appliances
Dual zone allows for independent control. I usually have the larger side set as the fridge and the smaller as the freezer. However, there are times when I completely turn one side off when it's not needed.
Price: $1,349.99
Model: CFX575DZ
Capacity: 75L
Size: 35.12 × 19.49 × 18.58 in
Temperature Range: +20°C to -22°C
Input Voltage (DC): 12/24V
Input Voltage (AC): 100-240V
Type: Compressor
Refrigerant: R1234yf
It is slightly louder than the almost identical CFX3 75DZ when the compressor is starting and stopping.
I originally purchased the CFX3 version, but after 2 years of use, one of the thermistors failed and was surrounded by ice and water. Both Dometic and Backcountry.com support were amazing. Dometic quickly offered to replace the unit for free (they actually started to ship one before I confirmed), and Backcountry.com offered a full refund (with free return shipping). I went with the Backcountry.com offer, as purchasing a new item would restart the warranty period.
The location of my fridge requires me to use an extension cable. I could have connected it directly to my DC fuse panel; however, keeping the cigarette port allows me to quickly connect it directly to my vehicle if my EcoFlow were to fail (this happened once).
Price: $8.99
Length: 3ft
Gauge: 18AWG
Max Current: 15A (built in fuse)
Heats fast, cools quickly, and easily wipes clean. I love not having to deal with a propane cooktop. This model is no longer available but there are lots of other similar options available.
Model: Tramontina 81500/108 (from Costco)
Rating: 120V~60Hz, 1800W
Heating/cooling
I opted to not have a dedicated AC unit, but I understand it's a must for some people.
This heater cranks out the heat and can make a van hot and toasty in cold winter temperatures. I have used this at 8,700ft elevation and with outside temperatures dropping below 10°F (-12°C).
Price: $729
Model: 4000P
Heat Output: 14,000BTU
Fuel: gasoline (diesel model available)
Operating Voltage: 11-16V
Working Elevation: ≤ 17,000ft
Size: 14.6 × 5.5 × 5.9 in
I have the original version without the Bluetooth smart thermostat. The thermostat interface is my main complaint; I have not used the newer smart thermostat to know if it's any better.
The install is more complicated than solar, as it requires you to drop the vehicle's fuel tank, route the fuel line, cut a hole in the floor for the heater, mount the fuel pump, route air intake, and mount the exhaust. Care needs to be taken as it deals with both an electrical item but also flammable fuel near very hot items such as the vehicle's exhaust shield. I made several custom brackets for various items to make the install better and safer (perhaps I will document these later).
Velit Gasoline Heater
Review & Install
Due to low voltage on startup (error code 01 and 03), I upgraded all but a few inches of my wiring harness from the original 14AWG to marine grade 10AWG. I used around 14 feet total. After upgrading the wiring I have not encountered the issue again.
Price: $1.99 (per foot)
Brand: Ancor
Model: 121125
Gauge: 10AWG
Exceeds all UL 1426, US Coast Guard Charter boat (CFR Title 46) and ABYC standards.
Used to splice together different wire sizes (in this case, 14AWG to 10AWG). From now on I plan to use these everywhere in my build. They are so simple, convenient, and worth the higher price.
Price: $9.99 (10 pack)
Max Current: 30A
AWG Range: 20-10AWG
They even have a spot to stick a multimeter without having to disconnect anything, which is helpful when troubleshooting.
I have two of these fans installed; one in the back and the other in the middle. Since the airflow direction can be changed on this model, it allows me to have one fan exhaust while the other fan pulls in fresh air.
Price: $336
Model: 00-07500K
Color: Smoke
Speeds: 10
Reversible: Yes
Remote control: Yes
Thermostat: Yes
Cutout size: 14 × 14 in
I made a custom bracket out of PVC trim board to help the base conform to the roof surface.
I purchased mine on Facebook Marketplace from someone who changed their mind. It's available in different sizes, however most people use the ~1" thick.
To install, I opted to spend slightly more and get the low VOC version of 3M 90 spray adhesive. Still be sure to wear a proper respirator while applying.
Other items
I went with this rack as it looked great and fit 600W of solar panels and 2 fans on my roof the best.
Price: $1,395
Model: 1003-MK56-00
Van Size: Transit 148 High Roof
To keep things low profile, I went with 1" t-slot aluminum. I opted for silver as it can't be seen, but it's also available in black. I purchased from a local supplier, which has unfortunately since relocated.
I made the ends blend in with my rack with some custom endcaps I designed and my friend who runs van-bling.com printed them for me.
Waterproof urethane caulk used to seal where the rack bolts to the roof.
Not required, but I applied this under where the wind fairing is to protect my shiny red paint.
Self-adhesive 80 mil automotive butyl sound deadening. I strategically applied this to the sides and roof.
Price: $74.95
Thickness: 80 mil
Area: 36 sqft
Many of my items are custom (bunk bed, cabinet, brackets, etc.) so I can't share links to them all. I hope to add more to this page in the future, so be sure to save it and check back later.
If you have any questions or feedback, please use the contact form and I will try to respond. If you found this useful or interesting, please share it with others.
* Prices listed may be out of date and can change at any time.