BLUETTI Alternator Charger Ford Transit Install Guide
Updated:
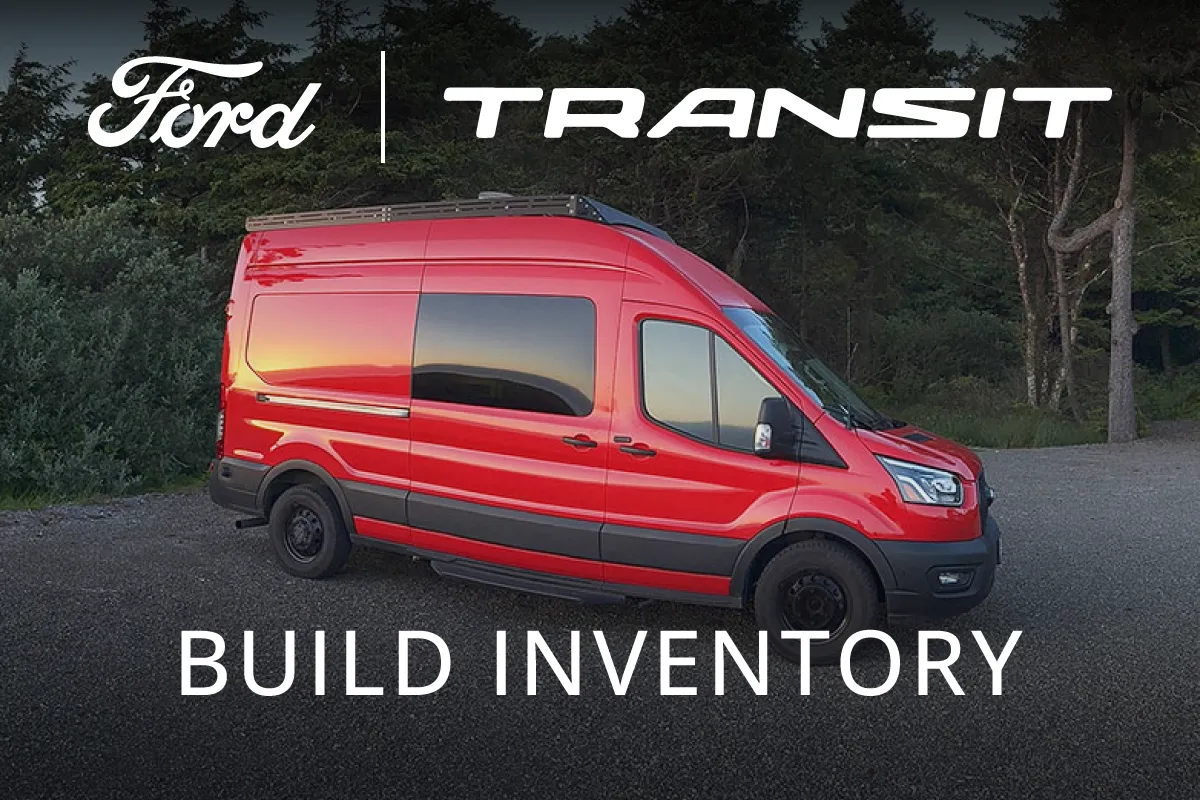
This guide provides instructions for installing a BLUETTI Charger 2 or BLUETTI Charger 1 alternator charger in a Ford Transit. The Transit's electrical system has unique features (BMS, CCPs, potential dual alternators/batteries) that require careful consideration.
This guide is based on:
- Direct consultation with a Ford Pro BBAS Services Engineer
- Ford Body and Equipment Mounting Manual (BEMM)
- BLUETTI product manuals and specifications
- My experience installing alternator chargers in a Ford Transit
Not sponsored. Thanks for supporting small independent creators. Affiliate links may earn me a small commission at no extra cost to you (info).
Charger Models
I recommend Charger 2 with the optional D+ cable for Transit installs, since Charger 1 doesn’t support D+ and is less reliable with the Transit’s smart alternator. For more details, see my Charger 2 review.
Be aware that the D+ cable is not expected to be available until June 2026, however you can make your own using a 5.08mm pitch pluggable terminal and some 18 AWG stranded wire. The Transit's ignition and engine run signals are accessed under the driver’s seat from the C33-E vehicle interface connector (full instructions coming soon).
 BLUETTI Charger 2Price: $331
$599 BLUETTI Charger 1Price: $219
$399
Charger 2 accessories are not yet available. This guide will be updated once more information about the D+ cable is available.
Fuse Upgrade
If you’re installing Charger 2, the included fuse assembly will not fit inside the Transit's tight battery compartment or on the CCP terminals. You will need to purchase the following components instead:
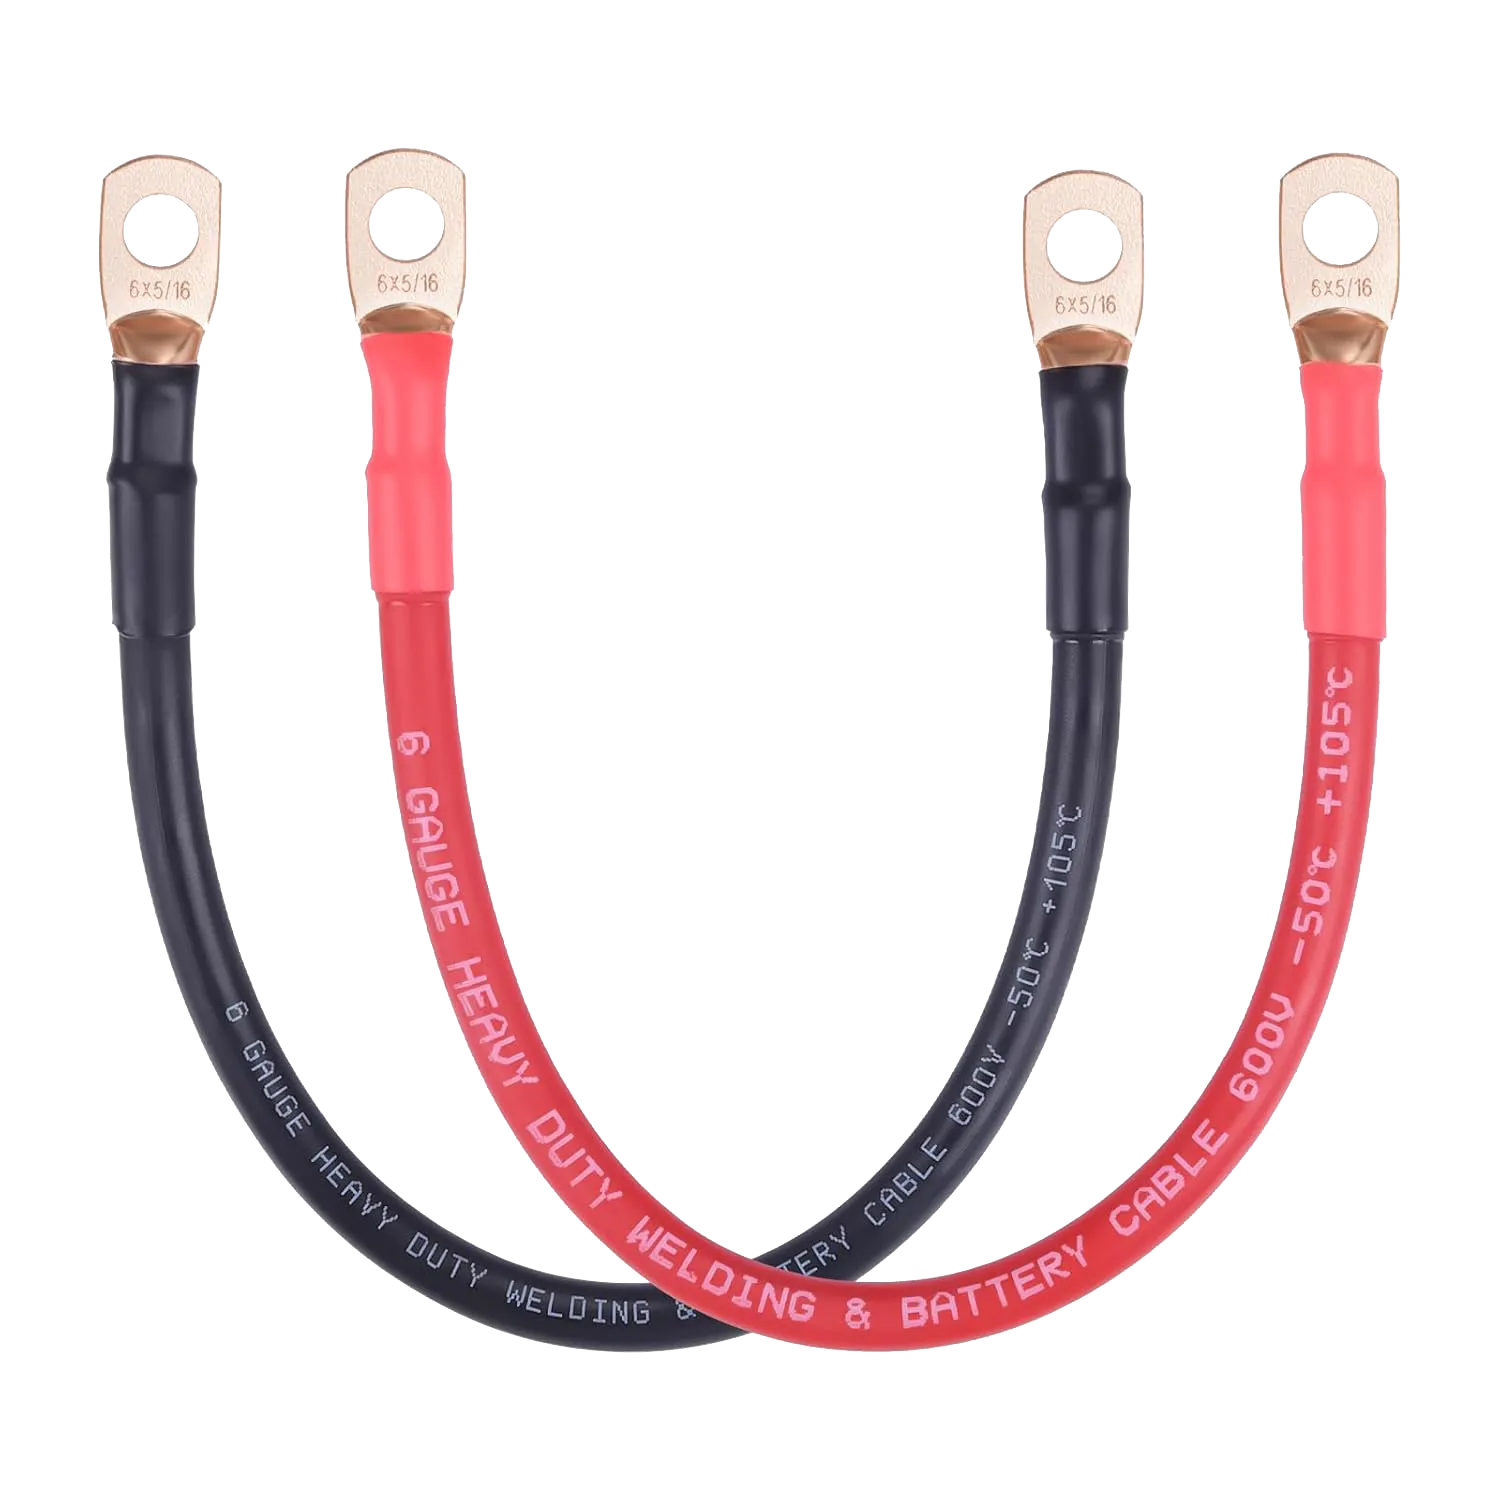 iGreely Automotive Battery Cable (only need red)6 AWG - 1 ft, 5/16" Lugs
Price: $10.99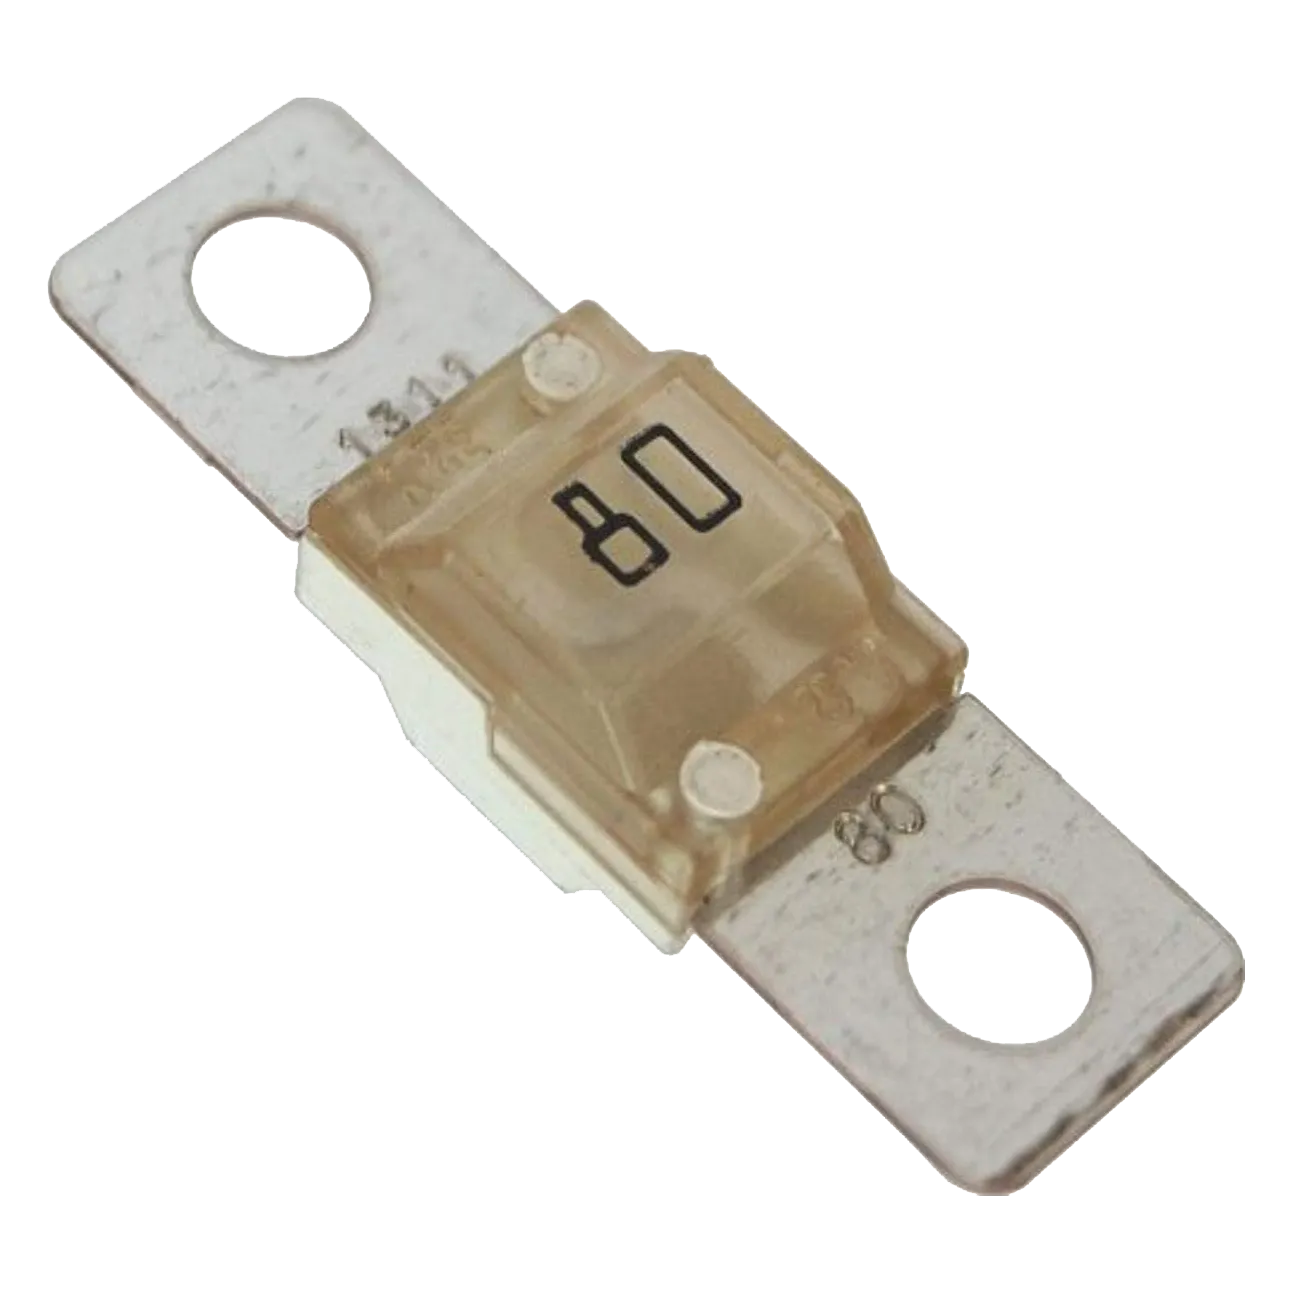 Blue Sea Systems 525580 Amp MIDI/AMI Fuse
Price: $11.95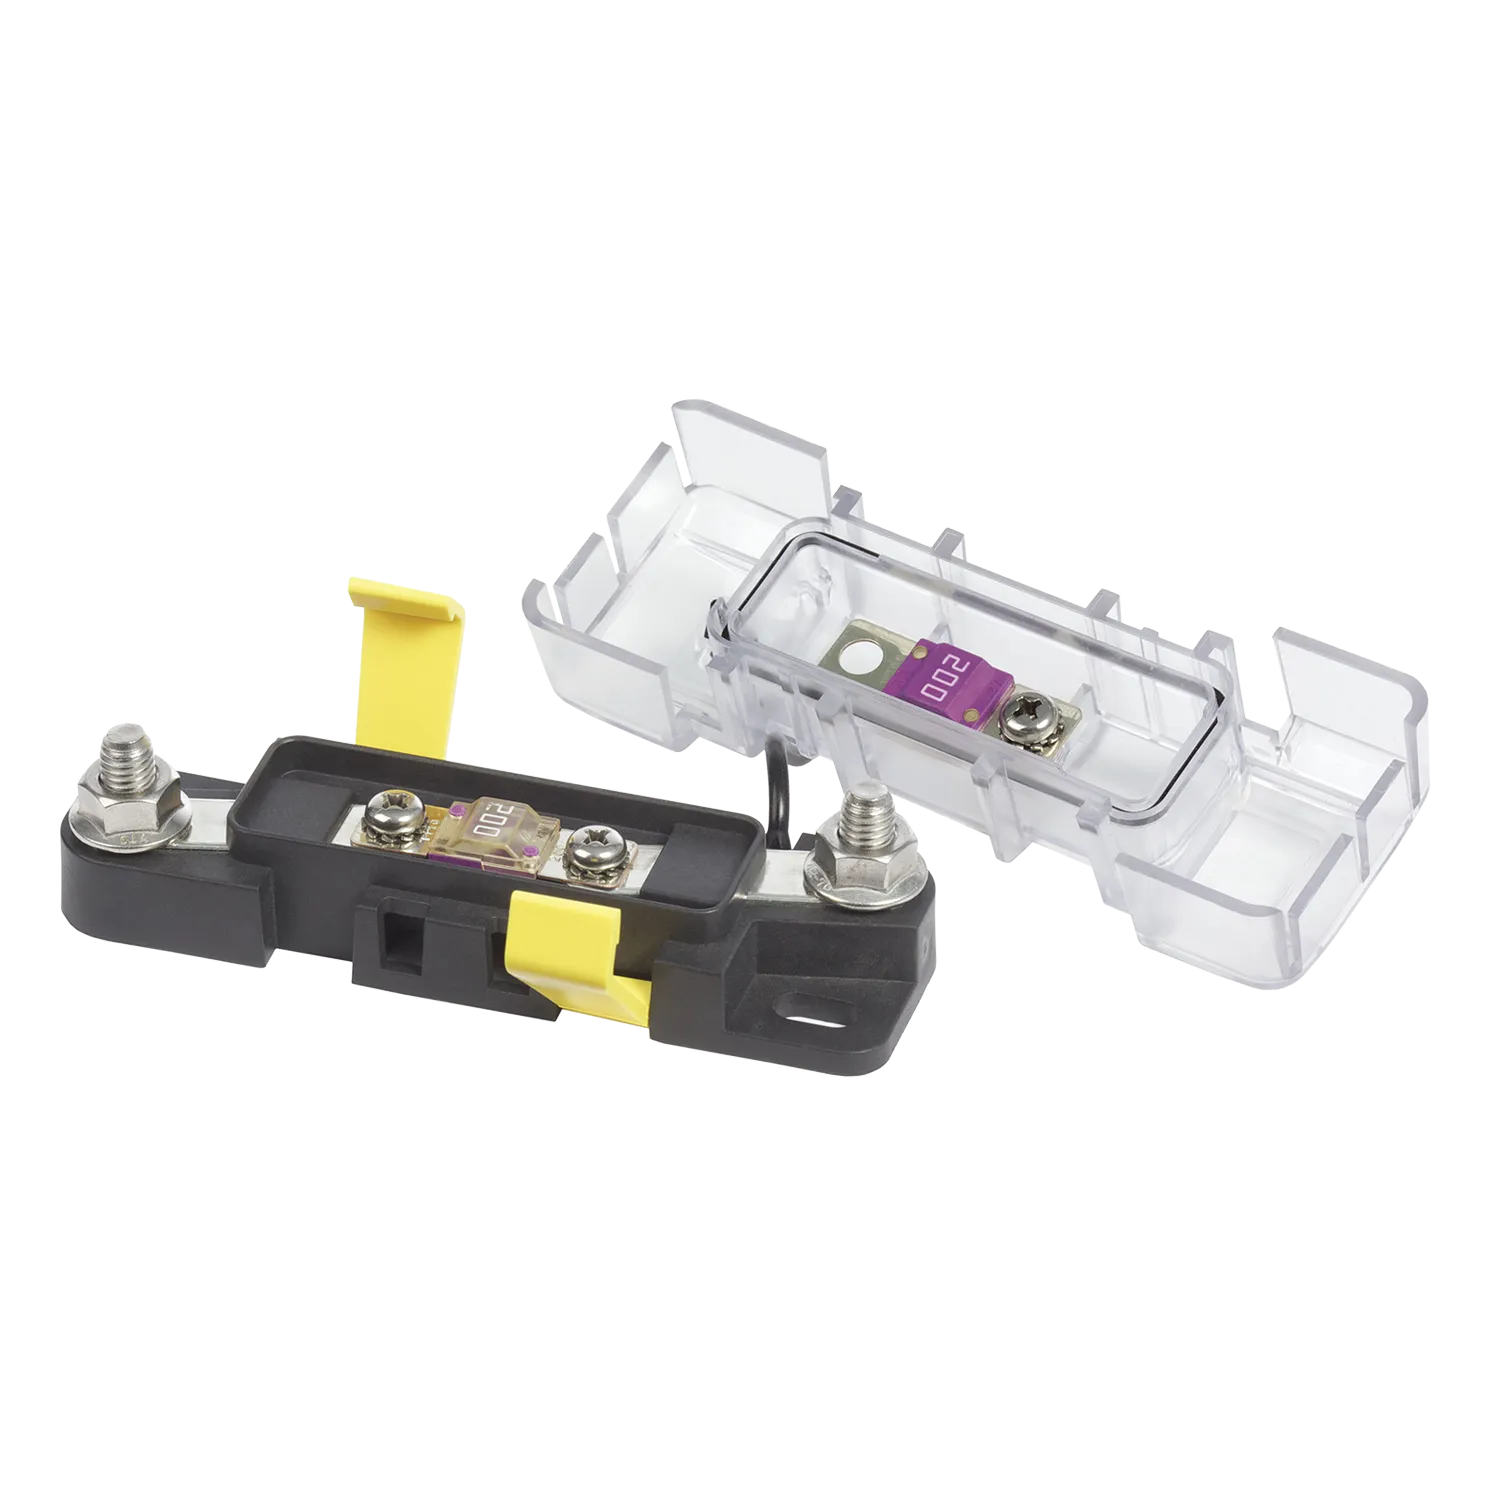 Blue Sea Systems 7720MIDI Safety Fuse Block
Price: $36.91$42.12
The Charger 2 positive cable connects to one side of the fuse block, while the red 6 AWG battery cable connects to the opposite side and continues to your selected positive connection point (battery or CCP). I will explain how to choose the correct connection point below.
There are cheaper fuse blocks available, but they transfer cable tension directly into the fuse, increasing the chance of cracking it during installation. The high quality Blue Sea Systems fuse block isolates the fuse from cable strain by using separate posts for the conductors and independent screws for the fuse, resulting in a reliable and durable setup.
The same setup will also work for Charger 1, although you can use a 70A fuse if you prefer.
Connection Options
Overview of the connection options supported by each Charger model:
| Fuse Rating | Connection Options | ||||
|---|---|---|---|---|---|
| Model | Included Fuse | Max Amps | Battery | CCP1 | CCP2 |
| Charger 2: Normal Charging | 75A | 62.5A | ✅ | ❌ | ✅ |
| Charger 2: Reverse Charging | 75A | 62.5A | ✅ | ❌ | ❌ |
| Charger 1 | 60A | 50A | ✅ | ✅ | ✅ |
| Fused Amps | Ignition Controlled 1 | |
|---|---|---|
| CCP1 | 60A | No |
| CCP2 | 175A | Yes |
| 3x CCP | 60A each | No |
1. CCP2’s ignition‑controlled behavior is not the same as the D+ ignition‑sensing signal for Charger 2. For reliable charger activation, the D+ cable is the better option.
Transit Electrical System
For additional details on the Ford Transit’s electrical system, refer to the BEMM:
Alternator
The current Transit now comes standard with a robust 250A alternator. These extra amps are ideal for charging a power station without putting too much strain on your vehicle's alternator. Additionally, some Transits come equipped with dual 250A alternators. It’s best to check what your vehicle has before pulling the full 800W from Charger 2. Most alternators have a sticker with their specifications; however, this can sometimes be difficult to see once installed (I can spot mine if I lay under my van at just the right angle). Your local Ford dealer should be able to help you determine which alternator is installed in your van.
Recent Transits come with smart alternators that adjust voltage output based on driving conditions to improve fuel efficiency. While this sounds great, it can cause the alternator charger to stop charging while driving. Charger 2 supports an optional D+ cable (sold separately) that detects the ignition state directly, avoiding the inconsistencies of voltage‑based detection.
Vehicle Battery
Unlike most vehicles, the Ford Transit's battery/batteries are located inside the cabin under the driver's seat. This is important for planning your wire routing.
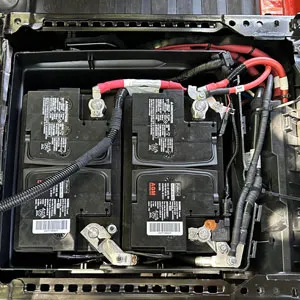
The Transit has 3 battery configurations (each uses a size H6 battery):
- Single Battery: 610CCA
- Single AGM Battery: 760CCA
- Dual AGM Batteries: 760CCA each

Two batteries can make for a tighter install of the fuse block when choosing to connect to the battery instead of the CCP, but it is still manageable. Dual batteries can act as a bit of an extra buffer to the alternator and also mean you don't need to worry as much if you accidentally leave your headlights on.
Battery Management System (BMS)
The Battery Management System (BMS) is responsible for monitoring and managing the battery's condition, charging rate, and power distribution. It ensures that the battery maintains an optimal charge while preventing excessive drain from vehicle accessories. When connecting directly to the battery cables, it is important not to bypass the BMS sensors.
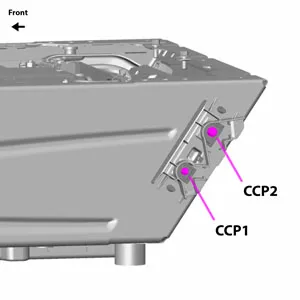
Customer Connection Point (CCP)
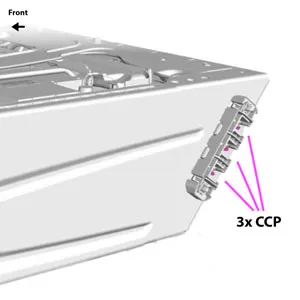
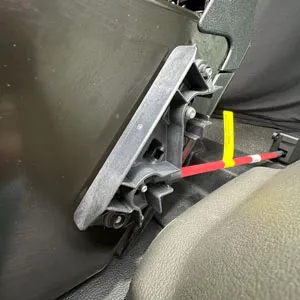
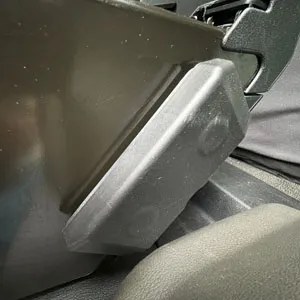
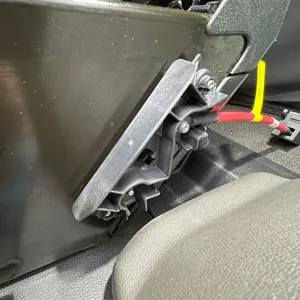
To determine which Customer Connection Points (CCPs) are installed in your Transit, remove the CCP cover (located on the outside edge of your driver's seat):
- One Stud: only CCP1 is present.
- Two Studs: CCP1 and CCP2 are present.
- Three Studs: Three CCP connections are present (each with the same spec as CCP1, follow guide for CCP1).

| Fused Amps | Ignition Controlled | Torque | Nut | |
|---|---|---|---|---|
| CCP1 | 60A | No | 2.6-3.6 ft·lb (3.5-4.5Nm) | M5 |
| CCP2 | 175A | Yes | 8.85 ft·lb (12Nm) | M8 |
| 3x CCP | 60A each | No | 2.6-3.6 ft·lb (3.5-4.5Nm) | M5 |
Making Connections
You will either need to connect to the Transit's battery cables or to CCP1 or CCP2.
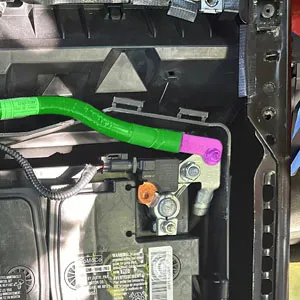
Connect to Battery Cables
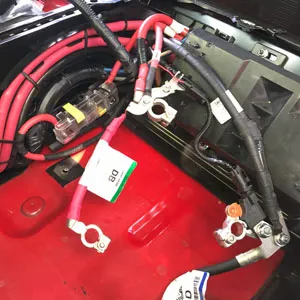
Recommend: This connection works with both models and has the least restrictions. It was recommended to me by a Ford Pro BBAS Services Engineer after I explained a similar alternator charger specifications and functions.
Here is how my alternator charger is connected. Note I also upgraded the fuse block:
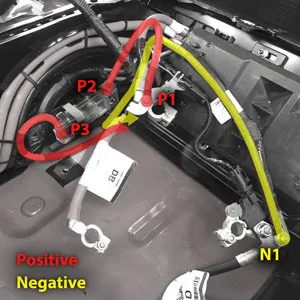
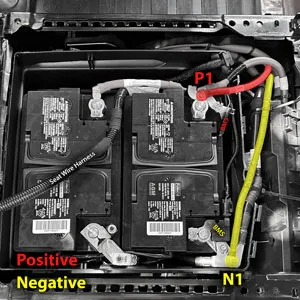
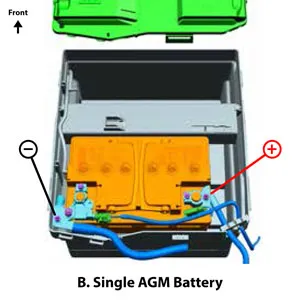
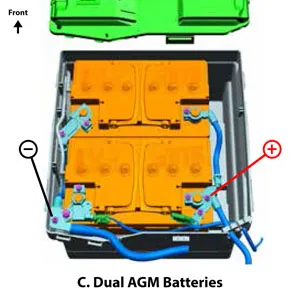
Here are the connection points for each of the three battery configurations:
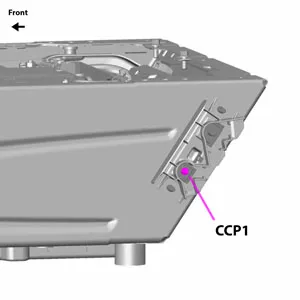
Connect Positive to CCP1
Only supported for Charger 1: Since CCP1 is fused at 60A, it doesn’t support the 62.5A maximum charge rating of Charger 2 model (Charger 1 maximum charge rating is 50A). CCP1 could support reverse charge and battery maintenance features since it isn't ignition controlled. Uses an M5 nut torqued to 2.6-3.6 ft·lb (3.5-4.5Nm).
Connect Positive to CCP2
Supported for either model: Doesn't fully support reverse charge or battery maintenance features. CCP2 is ignition controlled, meaning it only provides power when the van is running (with an automatic shutoff delay). This prevents accidental battery drain but also means it won't provide charging when the van is off. Because CCP2 is fused at 175A it supports the maximum charge ratings of both models (50A and 62.5A). Uses an M8 nut torqued to 8.85 ft·lb (12Nm).

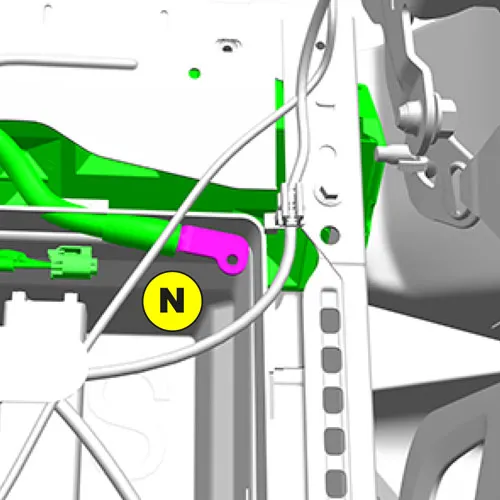
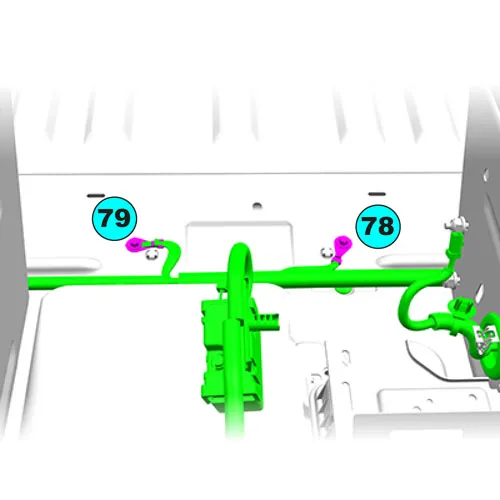
Connect Negative to Ground
You will be connecting the charger's negative cable to either the battery's negative cable or to a chassis ground point. The following images depict the official chassis ground points and the negative terminal connection recommended by a Ford Pro BBAS Services Engineer (2024 model year). Ground point "N" is a specific point on the van's negative battery cable. Ground points #78 and #79 are also close by but I found they are not easy to access (the floor panels in this spot are difficult to remove). Ideally, Ford would have included a dedicated ground point under the CCP cover. If none of the existing ground points are suitable, you can add a new one by following the guidelines outlined in the 2024 BEMM (see Adding a New Ground Point below).

Summary of Steps
Before beginning the final cable routing, it's a good idea to dry-fit the components to ensure everything works as expected. This allows you to test connections and verify functionality before committing to permanent installation.
- Route cables: Depending on your build, cables may need to be routed under the floor, through walls, or behind cabinets. Completing this step first is often best, as the end that connects to the van is the smallest. This makes it easier to pull through tight spaces where the larger end may not fit.
- Mount Charger: Attach it securely using screws or bolts. If needed, it can temporarily rest on the floor during setup.
- Connect Cables to Charger: Connect input and output cables to the charger using the instructions in the manual (manuals: Charger 2, Charger 1).
- Determine Fuse/Breaker: If needed, refer to the Fuse Upgrade section above to select the appropriate fuse or breaker for your installation.
- Connect Input Cable to Van's Electrical System: Securely connect the positive cable to either the battery cable, CCP1, or CCP2. Connect the negative cable to either the battery cable or a suitable ground point.
- Press Power Button on Alternator Charger (Charger 2 only): Locate the small button on the front of the charger and press it to power the unit on.
- Set Start Voltage in BLUETTI App: Adjust this setting to ensure the alternator charger automatically starts and stops based on whether the vehicle is on or off.
- Connect D+ Cable: If you’re using the optional D+ cable, connect it according to the instructions in the BLUETTI manual. This allows the charger to read the ignition signal directly instead of relying on voltage detection.
- Connecting Power Station: Follow the instructions in the app for setting up the connection to the power station.
Questions or feedback? Connect on Facebook, Instagram, or contact page. If you found this post helpful, please share it with others!
* I'm not an electrical engineer or electrician and take no responsibility for issues which occur as a result of this information.